PDF files have become an integral part of modern communication and document sharing. Whether you want to create, edit or markup PDF files, a reliable PDF editor is essential. But with so many choices, making the right choice can be overwhelming. Don't be afraid! In this article, we explore the 15 best free PDF editors that offer a wide range of features to suit your needs.
1. PDFescape:

PDFescape is a web-based PDF editor that allows you to create, edit, and annotate PDF documents without any installation required. It offers a user-friendly interface and basic editing tools, including text and image editing, form filling, and adding annotations.
Pros:
- No installation required; works directly from your web browser.
- Simple and intuitive interface.
- Supports most operating systems.
Cons:
- Limited advanced editing features.
- Requires an internet connection to use.
Supported OS: Windows, macOS, Linux, and web-based.
Download link: https://www.pdfescape.com/
2. Sejda PDF Editor:

Sejda PDF Editor is a comprehensive online editor that offers a rich set of editing tools for free. You can merge, split, compress, and convert PDFs, as well as add annotations, text, and images to your documents.
Pros:
- Allows editing large PDFs up to 200 pages for free.
- No watermarks on edited documents.
- User-friendly interface.
Cons:
- Limited number of free edits per hour (3 edits per hour).
- Advanced features locked behind a paywall.
Supported OS: Windows, macOS, Linux, and web-based.
Download link: https://www.sejda.com/pdf-editor
3. Smallpdf:
Smallpdf is a widely popular online PDF editor that provides various editing options, including merging, splitting, compressing, and converting PDF files. It also allows you to add text, images, and annotations.
Pros:
- Clean and intuitive interface.
- Offers cloud integration with Dropbox and Google Drive.
- Supports a wide range of file formats.
Cons:
- Free version has limited access to advanced features.
- Watermarks added to edited documents.
Supported OS: Windows, macOS, Linux, and web-based.
Download link: https://smallpdf.com/pdf-editor
4. PDF-XChange Editor:
PDF-XChange Editor is a robust desktop application with a free version that offers a comprehensive set of PDF editing tools. It allows you to edit text, add comments, and create fillable forms.
Pros:
- Feature-rich free version with no watermarks.
- Fast and efficient performance.
- Supports OCR for text recognition.
Cons:
- Free version lacks some advanced features found in the pro version.
- Only available for Windows.
Supported OS: Windows.
Download link: https://www.tracker-software.com/product/pdf-xchange-editor
5. LibreOffice Draw:
LibreOffice Draw is part of the LibreOffice suite and provides basic PDF editing capabilities. While primarily known as an open-source office suite, Draw allows you to edit PDFs, add images and text, and make annotations.
Pros:
- Completely free and open-source software.
- Cross-platform compatibility.
- Regularly updated with new features.
Cons:
- Limited advanced editing tools.
- Not as user-friendly as other options.
Supported OS: Windows, macOS, Linux, and more.
Download link: https://www.libreoffice.org/download/download/
6. Inkscape:
Inkscape is a powerful open-source vector graphics editor, and while its primary purpose is not PDF editing, it can handle basic PDF editing tasks. You can add and manipulate text, images, and shapes.
Pros:
- Free and open-source software.
- Advanced vector graphics editing capabilities.
- Active community and regular updates.
Cons:
- Not as straightforward for PDF editing compared to dedicated editors.
- May have occasional stability issues.
Supported OS: Windows, macOS, Linux
Download link: https://inkscape.org/release/
7. PDF Candy:
PDF Candy is an online PDF editor with a simple interface and various editing tools. It allows you to merge, split, convert, and compress PDFs. You can also add text, images, and watermarks.
Pros:
- Easy-to-use and navigate.
- No watermarks on edited documents.
- Batch processing for multiple PDFs.
Cons:
- Limited number of free edits per day (up to 5 edits per day).
- Requires an internet connection for use.
Supported OS: Windows, macOS, Linux, and web-based.
Download link: https://www.pdfcandy.com/
8. PDFsam Basic:
PDFsam Basic is a desktop PDF editor focused on splitting, merging, and rotating PDF pages. It also offers basic editing features such as adding images and text to PDFs.
Pros:
- Free and open-source software.
- Simple and fast processing.
- Available for multiple platforms.
Cons:
- Limited advanced editing features.
- Interface can be improved for ease of use.
Supported OS: Windows, macOS, Linux.
Download link: https://pdfsam.org/download-pdfsam-basic/
9. FormSwift:
FormSwift is an online PDF editor that specializes in creating and editing forms. It provides a user-friendly editor to modify existing forms or design custom ones.
Pros:
- Form-specific editing features.
- Allows easy form creation.
- Supports e-signatures.
Cons:
- Limited to form editing; not ideal for other PDF editing tasks.
- Watermarks added to edited documents.
Supported OS: Windows, macOS, Linux, and web-based.
Download link: https://formswift.com/edit-pdf
10. PDF Buddy:
PDF Buddy is a web-based PDF editor that offers basic editing tools such as adding text, images, and signatures. It also supports form filling and annotations.
Pros:
- No installation required.
- Intuitive interface.
- Supports collaboration on documents.
Cons:
- Limited number of free edits per month (3 free edits per month).
- Advanced features require a paid subscription.
Supported OS: Windows, macOS, Linux, and web-based.
Download link: https://www.pdfbuddy.com/
11. Foxit PDF Reader:
Foxit PDF Reader is a popular desktop application known for its lightweight and fast performance. While the free version is primarily a PDF reader, it also includes basic editing tools.
Pros:
- Fast and efficient performance.
- Allows text and image editing.
- Multi-tab document viewing.
Cons:
- Free version lacks some advanced editing features.
- Offers additional features as part of a paid suite.
Supported OS: Windows.
Download link: https://www.foxitsoftware.com/pdf-reader/
12. PDFelement:
PDFelement by Wondershare is a powerful PDF editor with a limited free version. It offers a range of editing tools, including text and image editing, form creation, and annotation features.
Pros:
- User-friendly interface.
- Supports OCR for text recognition.
- Offers a trial of the more advanced Pro version.
Cons:
- Free version adds watermarks to edited documents.
- Some advanced features require a paid subscription.
Supported OS: Windows, macOS.
Download link: https://www.wondershare.com/pdf-editor/
13. Soda PDF Online:
Soda PDF Online is a web-based editor that allows you to edit PDFs quickly. It offers basic editing features such as text and image manipulation, as well as form filling and annotations.
Pros:
- Simple and easy to use.
- Cloud integration with various storage services.
- Batch processing for multiple PDFs.
Cons:
- Limited number of free edits per day (up to 3 edits per day).
- Watermarks added to edited documents.
Supported OS: Windows, macOS, Linux, and web-based.
Download link: https://www.sodapdf.com/pdf-editor/
14. PDF24 Creator:
PDF24 Creator is a desktop software that provides PDF editing capabilities. It allows you to merge, split, and convert PDFs, as well as add text and images to existing documents.
Pros:
- Free and lightweight software.
- Supports other formats conversion to PDF.
- Includes a virtual PDF printer.
Cons:
- Interface can be slightly confusing for first-time users.
- Lacks some advanced features found in dedicated PDF editors.
Supported OS: Windows.
Download link: https://en.pdf24.org/pdf-editor.jsp
15. Master PDF Editor:
Master PDF Editor is a desktop application that offers a limited free version for non-commercial use. It provides basic PDF editing tools, including text, image, and shape manipulation.
Pros:
- User-friendly interface.
- Supports form creation and filling.
- Includes OCR for text recognition.
Cons:
- Free version adds watermarks to edited documents.
- Some advanced features require a paid license.
Supported OS: Windows, macOS, Linux.
Download link: https://code-industry.net/get-masterpdfeditor/
You can easily find the right tool for your PDF editing needs in this list of the 15 best free PDF editors. Whether you want web-based options for added convenience or desktop apps for more in-depth features, these editors include a variety of features. Be sure to consider your requirements, such as the need for advanced editing tools, compatibility with your operating system, and limitations of the free versions.
.png)


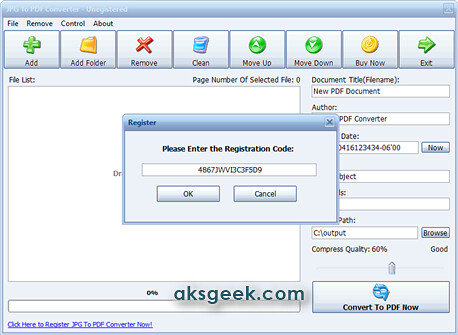
 2. Install it and go to About-> click on register and enter the registration code given below